Wersja polska na dole strony
The subject of the task was to prepare the families
library on the basis of the kitchen furniture producer`s directory.
The plan was
as follow:
1.
Divide all furniture into categories
/ families such as:
·
base units with single/double panel
and base units with 2/3 drawers;
·
wall units with single/double panel;
·
tall
units;
·
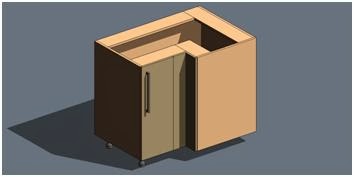
corner base units;
·
corner wall units;
·
corner
tall units;
·
hob base units with single/double
panel and hob base units with 2/3 drawers;
·
sink base units with single/double
panel and sink base units with 2 drawers;
·
corner base units with adjustable
width;
·
corner base units with adjustable
width and angle;
·
corner wall units with adjustable
width and angle;
·
false corner base unit with
adjustable width and angle;
·
false corner wall unit with
adjustable width and angle;
·
filling
elements;
·
housing
dishwasher tall units;
·
oven housing base units with hob;
·
oven
housing tall units;
·
refrigerator
tall units;
·
topwork;
·
side
panels;
·
plinth.
Division
on each family was made according to the producer`s catalog number (Family
Types) - if it exists.
2.
Identify the features of the furniture that
will be individually changed during the design process of the kitchen interior
(instance parameters). These are:
·
front cabinet material
·
handle type (or lack of it) and its
position (vertical or horizontal, distance from the edge of cabinets)
·
existence of hob, sink, oven and
their position
·
possibility to change the dimensions
of width/depth/angle of selected items.
Other parameters are strictly defined by the producer
therefore they received status of type parameters.
3.
Prepare individual elements (families
from categories: Furniture, Generic Model, Specialty Equipment, Plumbing
Fixtures, Detail Items) of which the entire cabinets will be made of– side and
rear panels, fronts, handles, sinks, hob, oven , symbols of door and drawers
opening etc. - together with the parameters necessary to their modification. At
this stage every element has been assigned to a sub-category (Properties /
Identity Data / Subcategory) so that its properties such as: material,
thickness, patterns and colors etc. can be easily controlled by Object Styles
and Visibility / Graphic Overrides.
4.
Compose different families (Casework
category) using pre-made elements and suitable settings of type and instance
parameters, so that working with the prepared family was as simple as possible.
Tematem zlecenia było przygotowanie biblioteki rodzin na podstawie katalogu jednego z producentów mebli kuchennych.
Plan
działania był następujący:
1. Podzielić wszystkie meble na kategorie/rodziny takie jak:
· szafki dolne z pojedynczym/podwójnym panelem oraz z dwiema/trzema szufladami;
· szafki górne z pojedynczym/podwójnym panelem;
· szafki wysokie;
· szafki dolne narożne;
· szafki górne narożne;
· szafki wysokie narożne;
· szafki z płytą grzewczą z pojedynczym/podwójnym panelem oraz z dwiema/trzema szufladami;
· szafki ze zlewem z pojedynczym/podwójnym panelem oraz z dwiema/trzrma szufladami;
· szafki narożne dolne ze zmienną szerokością;
· szafki narożne dolne ze zmienną szerokością oraz zmiennym kątem;
· szafki narożne górne ze zmienną szerokością oraz zmiennym kątem;
· elementy zaślepiające narożne przy szafkach dolnych ze zmienną szerokością oraz zmiennym kątem;
· elementy zaślepiające narożne przy szafkach górnych ze zmienną szerokością oraz zmiennym kątem;
· elementy wypełniające;
· szafki wysokie z zabudowaną zmywarką;
· szafki dolne z zabudowanym piekarnikiem oraz płytą grzewczą;
· szafki wysokie z zabudowanym piekarnikiem;
· szafki wysokie z zabudowaną lodówką;
· blat;
· płyty boczne;
· cokół.
W każdej rodzinie zastosowano podział według numeru katalogowego producenta (Family Types) - jeśli takowy występuje.
2. Ustalić cechy mebli, które będą podlegać indywidualnej zmianie podczas projektowania wnętrza kuchni (parametry wystąpienia/instance parameters): Są to
· materiał frontu szafek
· rodzaj uchwytu (lub jego brak) oraz jego pozycja (układ pionowy bądź poziomy, odległość od krawędzi szafek);
· wystąpienie płyty grzewczej, zlewu, piekarnika oraz ich pozycja;
· możliwości zmiany wymiarów szerokości/głębokości/kątów dla wybranych elementów.
Pozostałe parametry są ściśle określone przez producenta dlatego otrzymały status parametrów typu (type parameters).
3. Przygotować pojedyncze elementy (rodzin z kategorii: Furniture, Generic Model, Specialty Equipment, Plumbing Fixtures, Detail Items), które będą składać się na całe szafki - płyty boczne oraz tylne, fronty, uchwyty, zlewy, płyta grzewcza, piekarnik, symbole otwierania drzwi, szuflad itp. - wraz z parametrami niezbędnymi do ich modyfikacji.
Na tym etapie również przypisano "podkategorię" dla każdego z elementów (Properties / Identity Data / Subcategory) dzięki czemu podczas projektowania można w prosty sposób sterować zbiorczo takimi cechami elementów jak: materiał, grubości, wzory oraz kolory wyświetlanych linii poprzez Object Styles and Visibility / Graphic Overrides.
4. Złożyć poszczególne rodziny (Casework category) wykorzystując wcześniej przygotowane elementy składowe oraz odpowiednie ustawienie parametrów wystąpienia i typu, tak aby obsługa gotowej rodziny była jak najprostsza.